When giving online presentations, it helps for personal marketing if people can see you on the screen. Various tools provide features which help you achieve that, for example Microsoft Teams. Sometimes though you do not have that available or want to be able to do more than what the tool you are using provides. Using OBS Studio (free) with Snap Camera (free) or ChromaCam ($29.99 lifetime license) you can easily put yourself in your own presentations in such a way that it will work on almost any medium you would like to present on without having to invest in a green screen. Want to know how? Read on!
Tools used
- OBS Studio (here)
OBS Studio is free open source software which allows you to do many interesting things to video - OBS VirtualCam (here)
OBS VirtualCam is an OBS Studio plugin which allows you to output of OBS Studio to a virtual camera device. This device can be used as source camera in tools like Skype (the Desktop version, not the App!) or Teams - Snap Camera (here)
Snap Camera can filter you out your background and replace it with whatever you like. ChromaCam (here) is a commercial alternative used for most screenshots in this blog post. It provides additional options and better quality background filtering. You can also use Snap Camera or ChromaCam to surprise colleagues in online meetings.
This setup has been created on Windows but parts of it are portable to other OSs. Snap Camera is also available for macOS just like ChromaCam. OBS Studio works on Windows, macOS and Linux. The OBS VirtualCam plugin is Windows only. I've tested this with Skype, Teams and YouTube Studio but I expect other broadcast/meeting software to also work.
Setup
First download and install OBS. Next install the OBS VirtualCam plugin. Next install Snap Camera. These are 'next, next, finish' installers so I will not go into detail here.
The below setup describes the use of Snap Camera. Using ChromaCam is similar but the quality is better (it is better able to distinguish you from the background) and it has some additional features.
Snap Camera
Start Snap Camera and search for Green Screen. You can chose one of the plugins presented (they are similar in quality)
OBS Studio
Open OBS Studio and add under sources a Video Capture Device. Select the Snap Camera and accept the defaults.
Right-click the Video Capture Device and select Filters
Add the Chroma Key filter and set it to green. You can tweak the settings to get optimal results. It makes a specific color transparent in the image so you can put something underneath.
Presentation
Add a browser to the sources, put it in order below your Video Capture Device and interact with it by right clicking, interact.
Now you can open your presentation in your browser from your OneDrive folder in Windows and put it full screen in the browser window. Resize the layers so they will fit your broadcast. I did not manage to do this directly with Powerpoint, hence the browser trick. You can browse through slides using the interact screen which will not be broadcast. This works great when you only have a single screen available!
Broadcasting using VirtualCam
Using the OBS VirtualCam, your OBS output becomes available in other tools as an OBS-Camera.
Below you can see an example from Microsoft Teams. In the Custom Setup screen you can select your camera.
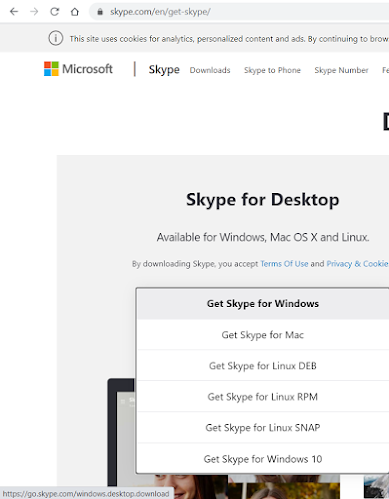
When using Skype mind that for Windows in order to use the OBS-Camera, you cannot use the Skype App but need the Skype Desktop application.
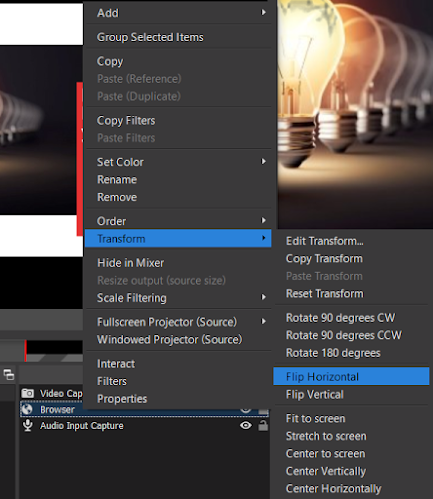
If the presentation is flipped, you can fix it by right clicking the Browser source, Transform, Flip Horizontal.
Broadcasting using YouTube Studio
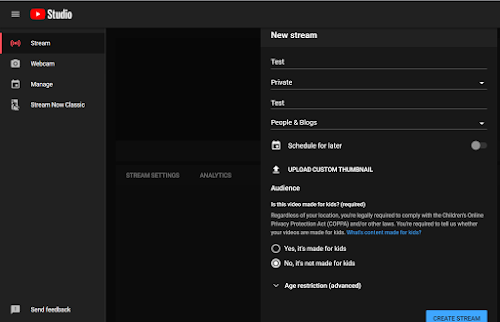
Open YouTube Studio (here) and create a new stream. Mind not to make it for kids since that will limit your options.
Copy the Stream key
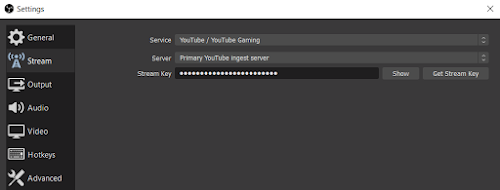
Input the stream key in OBS Studio, File, Settings, Stream.
Now start broadcasting (the button on the bottom right) and check the stream. Ready to go live! When you go live, you can share the link to the broadcast and people can tune-in, no specific client required. Only a browser.


No comments:
Post a Comment