The OWASP top 10 has listed the following vulnerability for several years (at least in 2013 and 2017): using components with known vulnerabilities. But software nowadays can be quite complex consisting of many dependencies. How do you know the components and versions of those components do not contain known vulnerabilities? Luckily the OWASP foundation has also provided a dependency-check tool with plugins for various languages to make detecting this more easy. In this blog post I'll show how you can incorporate this in a Jenkins pipeline running on Kubernetes and using Jenkens and SonarQube to display the results of the scan.

Prerequisites
I used the environment described here. This includes a ready configured kubectl and helm installation. For the Jenkins installation and basic pipeline configuration I used the following here. In order to execute the below steps you should have at least a Kubernetes and Jenkins installation ready. If you want to use the literal code samples, you also require the Jenkins configuration as described including this.
OWASP dependency-check
The OWASP foundation provided Dependency-Check plugins for various build tools such as Ant, Gradle and Maven and a Jenkins plugin. They also have a standalone CLI tool available. Mind that the more specific a plugin you use, the more relevant the findings will be. You can for example use the Dependency-Check Jenkins plugin to perform a scan, but it will not understand how dependencies inside a pom.xml work so will not give sufficiently useful results. You will get something like below:

When you implement the Maven Dependency-Check plugin to produce results and the Jenkins Dependency-Check plugin to get those results visible in Jenkins, you get results which are specific to a Maven build of your Java application. This is quite useful! When using this you will get more accurate results like below.

The Jenkins Dependency-Check plugin (which can be used within a pipeline) also produces trend graphs and html reports inside Jenkins.

Thus use the Maven Dependency-Check plugin to scan your project and use the Jenkins plugin to publish the results generated from the scan to Jenkins. After you have installed and configured SonarQube, you can use the same results to publish them to SonarQube.
Maven plugin configuration
You can find the pom.xml file I used here. You can execute the scan by running mvn dependency-check:check.
       <plugin>
         <groupId>org.owasp</groupId>
         <artifactId>dependency-check-maven</artifactId>
         <version>6.0.2</version>
         <executions>
           <execution>
             <goals>
               <goal>check</goal>
             </goals>
           </execution>
         </executions>
         <configuration>
           <failBuildOnCVSS>7</failBuildOnCVSS>
           <!-- Generate all report formats -->
           <format>ALL</format>
           <!-- Don't use Nexus Analyzer -->
           <centralAnalyzerEnabled>false</centralAnalyzerEnabled>
           <!-- Am I the latest version? -->
           <versionCheckEnabled>true</versionCheckEnabled>
         </configuration>
       </plugin>
Notice the format ALL is specified. This generates an HTML, JSON, XML and CSV report in the target folder. SonarQube will use the JSON report and Jenkins the XML report. I have not looked at the central analyzer (this appears to be a feature which is part of the commercial Nexus distribution). This might help reduce build time since the vulnerability files can be shared across scans and do not need to be downloaded every time.
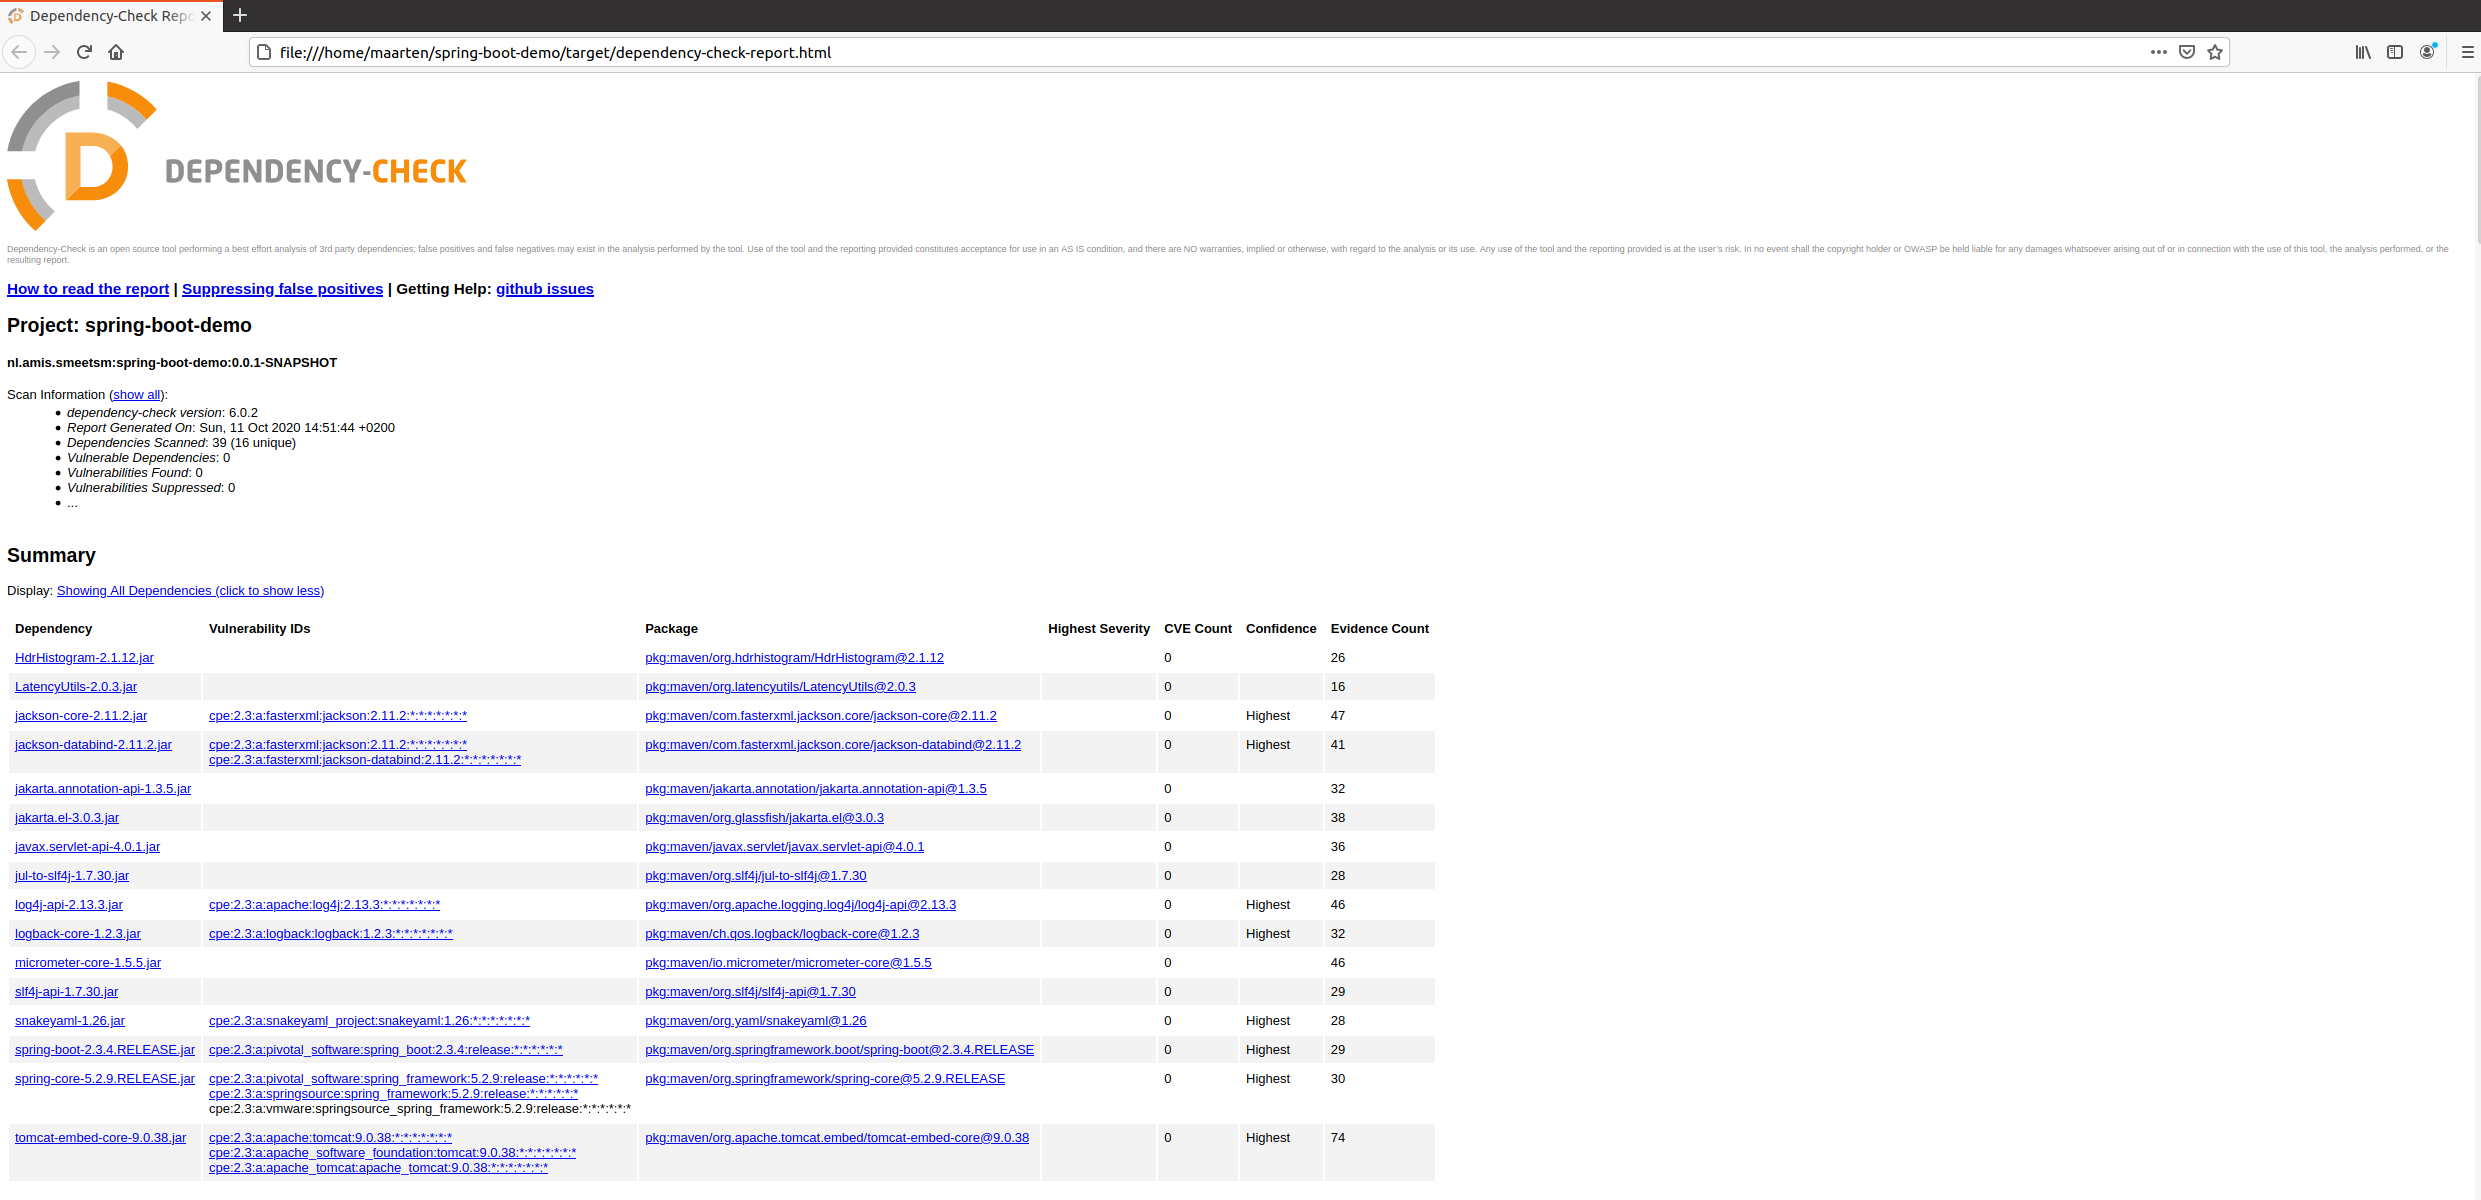
You can browse the HTML report yourself if you like. Using this you can confirm that the dependencies were identified and actually scanned. My scan found 0 vulnerabilities so I was worried the scan was not executed correctly but the results showed the different dependencies and how they were evaluated to they were correct. A new Spring Boot version does not contain vulnerable dependencies as it should!
Installing SonarQube
There are various ways you can install SonarQube on Kubernetes. There are Docker images available which require you to create your own Kubernetes resources, but also a Helm chart. The Helm chart is really easy to use. For example, it creates a PostgreSQL database for the SonarQube installation for you without additional effort. The PostgreSQL database which is created is of course not highly available, clustered, etc. Using Helm value overrides, you can specify your own PostgreSQL DB to use which you can setup to fit your availability needs. The default username and password is admin. Of course change this in a production environment. A small drawback is that the chart is not 100% up to date. Currently it installs version 8.3 while 8.5 is already available. I'm not sure if this is an indication not much maintenance is being done on the chart. I hope this is not the case of course, else I would not recommend it. If you do use it, keep this in mind. For a lab scenario like this one I do not care whether I get version 8.3 or 8.5.
Installing SonarQube on Kubernetes can be done with the following commands using the helm chart;
 helm repo add oteemocharts https://oteemo.github.io/charts
 helm repo update
 kubectl create ns sonar
 helm install -n sonar sonar-release oteemocharts/sonarqube
After the installation is complete, you can access it with:
 export POD_NAME=$(kubectl get pods --namespace sonar -l "app=sonarqube,release=sonar-release" -o jsonpath="{.items[0].metadata.name}")
 kubectl -n sonar port-forward $POD_NAME 8080:9000
And going to http://localhost:8080. Username and password are as indicated admin

Configuring SonarQube in Jenkins
In the previously described setup, you can access Jenkins with:
 export POD_NAME=$(kubectl get pods --namespace jenkins -l "app.kubernetes.io/component=jenkins-master" -l "app.kubernetes.io/instance=my-jenkins-release" -o jsonpath="{.items[0].metadata.name}")
 printf $(kubectl get secret --namespace jenkins my-jenkins-release -o jsonpath="{.data.jenkins-admin-password}" | base64 --decode);echo
 kubectl --namespace jenkins port-forward $POD_NAME 8081:8080
The second line gives the password of the admin user you can use to login. The last command makes a Jenkins pod available on localhost port 8081.
In SonarQube you can obtain a secret. The SonarQube pipeline plugin in Jenkins can be configured to use the secret to store results from the build/dependency-check in SonarQube.


   stage ('OWASP Dependency-Check Vulnerabilities') {
    steps {
     withMaven(maven : 'mvn-3.6.3') {
      sh 'mvn dependency-check:check'
     }

     dependencyCheckPublisher pattern: 'target/dependency-check-report.xml'
    }
   }

   stage('SonarQube analysis') {
    steps {
     withSonarQubeEnv(credentialsId: 'sonarqube-secret', installationName: 'sonarqube-server') {
      withMaven(maven : 'mvn-3.6.3') {
       sh 'mvn sonar:sonar -Dsonar.dependencyCheck.jsonReportPath=target/dependency-check-report.json -Dsonar.dependencyCheck.xmlReportPath=target/dependency-check-report.xml -Dsonar.dependencyCheck.htmlReportPath=target/dependency-check-report.html'
      }
     }
    }
   }

Executing the pipeline

When you execute the pipeline, SonarQube gets fed with various results and can also produce a measure of technical debt in your project. In this case test coverage (produced by the Maven Jacoco plugin) and data produced by the OWASP Dependency-Check.


You can of course further expand this to include more thorough code quality checks by including Maven plugins such as Checkstyle, PMD and JDepend.
No comments:
Post a Comment